Reader Program
The Glasses Reader program is part 1 of a two part solution where the Glasses Inventory Program is part 2. The Glasses Reader program is run before taking the trip to allow you to build the inventory and to also scan it for errors so you can manually correct them. Look at the figures to the left to understand more about it. The Glasses Inventory program is run on the trip for selection of the appropriate glasses from inventory. Click here for a copy of the detailed online documentation for the program:
The Glasses Reader program allows a mission or humanitarian team to measure a large collection of glasses using automated lensmeters. It also allows one to enter a large collection of glasses into the inventory manually or through a bar code reader. While entering the prescription, the glasses reader program can create a bar encoded label which can be used later by the same program to enter prescriptions into inventory. Here is a block drawing of one possible scenario:
DISTRIBUTION GLASSES GLASSES
CENTER ARE DISTRIBUTION
BUILDS INVENTORY SHIPPED MISSION TEAM
Measures glasses using =======> Team uses a bar code
lensmeters and prints the reader to assign inventory
labels. numbers and enter glasses
into inventory.
The team can also manually enter the data into the computer. Detailed documentation on the glasses reader program will be provided with the purchase of the program.
Figure 1 shows the main window of the program. The program is set up by clicking on the Options selection in the top/left corner as shown in Figure 2. Looking at Figure 2 you can see the following selections.
UPDATE: With the latest version of this program you can change from Spanish to English both from the main window and also in the options window. Look at the items circled in Figures 1 and 2.
Identify your Lensmeter.
Select one of these:
Reichert Lenschek, Reichert AL200, Reichert AL500, Humphren LA340, Humphrey LA350/360, Marco VL-3000, Topcon CL-100, Nikon NL-2, SLM 5000/4000, Nidek LM-600/1000, Tomey TL-900, Tomey TL-2000/3000, Justice JS-700, Essilor CLE-060, Seiko SL-7000, VisionX VX40, Reichert LensChek Plus, Huvitz 3100P, Huvitz 7000 and Huvitz 7000P. One can also indicate that bar code or keyboard input will be performed.
Select COMM Port number.
Select the number of your COMM port from 1 to 18. Select None if you aren't using a lensmeter.
Path to collection files.
Select the file path as to where the data collection files must be placed. This path and all directories for it must exist or the program will alert you to this error. You can also click No File Output or input if you are just creating barcode labels. If you are building your inventory you SHOULD click Check to read file into memory at startup. If you feel that your options file has been corrupted you can click the button pointed to by the arrow and then you will have to reset all your options and click Save to File and Continue at the bottom/left of the window.
Printing Control.
Printing You can turn printing on or off.
Print After Measurement You can turn on and off the indication to print the label immediately after measurement. This should be off if you plan to add manual characteristics about the glasses before printing.
Show Inventory # on printout? You can turn off and on the printing of the inventory number on the label.
Choose Printout and Printer Form
There are four options you can choose in this area:
1) Detailed text plus bar codes. You can select between DYMO 30256 shipping
labels or 30270 Continuous Wide paper.
2) Brief large text plus bar codes. You can select between DYMO 30256 shipping
labels or 30270 Continuous Wide paper. You can also choose to add spherical
Equivalent to the printout. This is the most popular choice.
3) Print labels for 2 uncut lens. You can select between DYMO 30256 shipping
labels or 30270 Continuous Wide paper. This is for labels for lens without frames.
Two labels are produced.
4) Brief Large ext only - No barcode. You can select between DYMO 30256
shipping labels, 30270 Continuous Wide paper, or short address labels. When
you select this option to print dual vacancy labels you select 30336 short address
labels.
Barcode Data Entry.
When the bar code reading option is selected you will see Figure 3 at the top of the window and the yellow barcode button in Figure 4 is added to the bottom.
When you click this yellow button you will see the window showing in Figure 5 (unexpanded and expanded). The user will then wands in from the label the top bar (right eye) and bottom bar (left eye) and this window will accept the data and store the results on the inventory file or perhaps even optionally print another label. This process allows you to build your inventory.
Manual Data Entry.
A user can also manually enter the data. If you click on the "Manual Data Entry" option at the bottom/left of the screen you will see Figure 6 followed by Figure 7. This provides a special mouse controlled keypad to enter the glasses prescription. For example to enter a 1.25 in the left sphere click "1" ".25" and then click the left sphere field and you will see Figure 8. To enter "1.75" in the right sphere you click "1" ".75" and then click the right sphere field and you will see Figure 9.
Clicking any of the Both buttons causes the number in the data entry area to be copied not only in the the field to the immediate left to also to the equivalent field on the opposite side. For example if you enter 2.25 and then click the Both to the right of the right sphere 2.25 is entered both in the left and the right sphere areas.
Clicking C will clear the entry in the field to the right of C. Click UNDO will undo the last entry. If you have a positive or negative cylinder reading, you can click the Transpose Reading button and revert to the other convention (positive to negative and negative to positive). Figure 10 shows negative cylinder entry while Figure 11 shows the display after havling clicked both the left and the right Transpose Reading button. Figure 11 also shows the warning which displays to the left of the left cylinder and to the right of the right cylinder. Readings must not be saved which have a positive cylinder. Note that when you enter Manual Entry mode you will see the following on the screen:
If you enter the sphere as positive but you want it to be negative instead (or vice/versa) you can double click the green button to the left ot the sphere that looks like this:
and the sign of the sphere will be reversed.
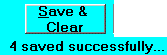
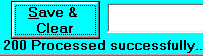
Entering Multiple Readings
As you enter multiple readings from the lensmeters, the system will automatically save them when a new reading arrives. It will indicate below the SAVE button "xxxx saved successfully..." as shown below.
or if you have turned off file save you will get:
After saving an entry, the system will automatically increment the inventory number as shown in Figure 12. This allows for rapid data entry from a lensmeter of between 2 and 3 entries per minute. When you are manually entering data, you need to click SAVE yourself which again will automatically increment the number.
Printing Labels.
If you click the "Printing On" option in Figure 2 you will see the button shown in Figure 13. If you have selected the "Print After Measurement" option in Figure 2 then the label will be automatically printed after the measurement is transmitted from the lensmeter to the computer. This means that as soon as the data is entered the barcode printing begins.
NOTE: Barcode printing requires the purchase of a Dymo Labelwriter model 450 or 450 turbo like shown in Figure 14. You will need to also download two barcode fonts using these two links:
After they are downloaded then double click on the two files: Bar39d.ttf and Bar39f.ttf to install them in your PC.
Flags Entry.
Figure 15 shows the flags entry field where one can describe the glasses. Several of the flags are automatic while several must be manually entered.
Automatic Flags Bi-Trifocal, Progressive, Reading Glasses (optional) when you set the below flag:
You click the second flag so you will get a popup windows like the below when a pair of readers have been detected.
Manual Flags Sunglasses, Scratched, For Male, For Female, Either Male or Female, For child. Reading glasses is manual when you clear the above option.
Frame Size
As you can see in Figure 16 here you can select the frame size. It is assumed that small is 65mm, Medium is 67mm and large is 70mm. You can also enter the actual PD or it is automatically entered by some lensmeters.